We started by mixing the following ingredients until we had a "playdoh like" consistency:
2 C flour, 4 Tablespoons cream of tartar, 2 Tablespoons cooking oil, 1 C salt, 2 C boiling water
 Once we had our playdoh, we divided it into thirds and used Kool-Aid packets to dye each section. The blue and green colors were the most vivid. We tried red and orange as well, however, I would suggest using two packets for either of those colors, as they were much more subtle.
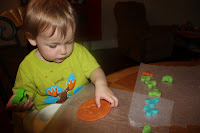
Little Man started by practicing with the heart shape cutters. He had so much fun learning how to use them!

He was very excited each time he successfully added a new heart to his collection.

Of course, we count anything and everything around our house, so we made sure to count all our blue butterflies too!
 After we had counted the blue butterflies, we moved on to something a bit more challenging.
 LM cut "propellers" out of three different colors and then I asked him counting questions involving each of the colors. He really impressed me when he answered my questions that required him to identify colors AND count the objects: "How many blue propellers do you have?".

After we were done counting, of course we had to play with our new letter cutters as well. LM had fun putting the letters of his name in the right order.
And, of course, before we put the playdoh back in the fridge, we had to play with the "biggie worms" and make them into circles! The recipe I was given said we could keep our playdoh in an air tight container in the fridge for up to one month! YAY!!
So, the moment came and went...we had a fantastic time, and learned all the while. Me, I learned how to make playdoh. And my Little Man, he practiced his colors, counting, letter and shape skills, learned what playdoh is, and how to use the shape cutters. Yep, brand new skills for us both
today! :)


0 comments:
Post a Comment